 Web RPN calculators: program editor help
Web RPN calculators: program editor help
Web RPN calculators: program editor help
This page contains information about the programming tool for the RPN calculators of the "Voyager" family (e.g. HP-12C and derivatives).
Clique aqui para ler a versão em Português.
Currently, this tool is available for the Web calculators. In the future, the tool will be bundled with the Android and iOS apps. At the moment, you can edit your programs on the computer and share them with the apps.
This guide assumes you are already familiar with the RPN calculator. The tool tries to be as intuitive as possible for the users that already know their ways in RPN.
If you have any questions or issues, contact us.
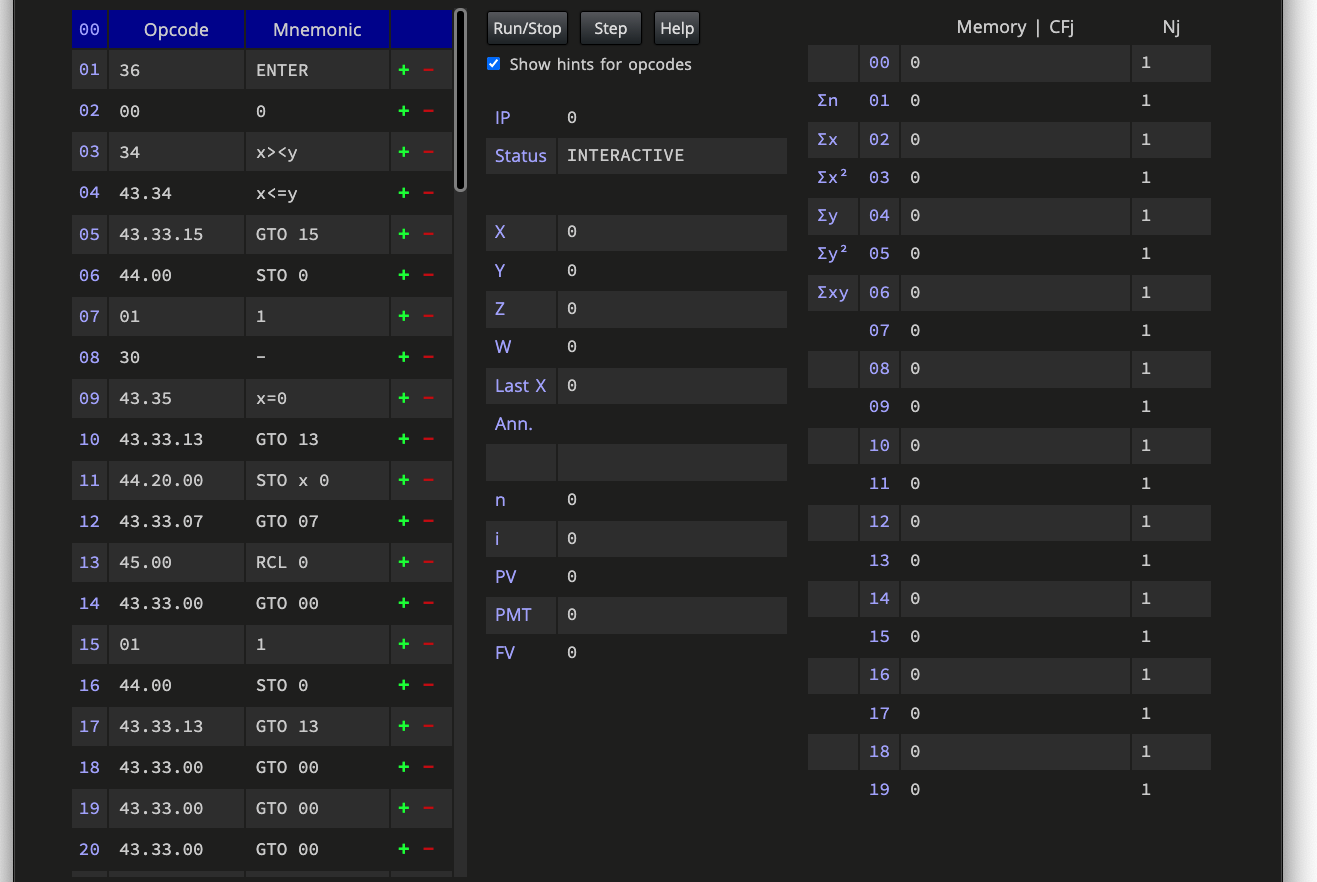
The tool screen has four major sections: program editor, program execution buttons, calculator state, and storage.

The calculator state, shown in central column, is comprised of stack registers, financial or scientific registers, instruction pointer, annunciators, etc.
The storage registers, accessible via STO and RCL, can be seen at right column. On financial calculators, these registers also store cash flows (CFj, Nj). Moreover, some of them are reused by statistical functions, as indicated by the labels.
Feel free to operate the calculator and see how the registers react to each operation. We suggest opening the screens side by side, in separate windows. It is more ergonomic, and the tool will work better this way. (*)
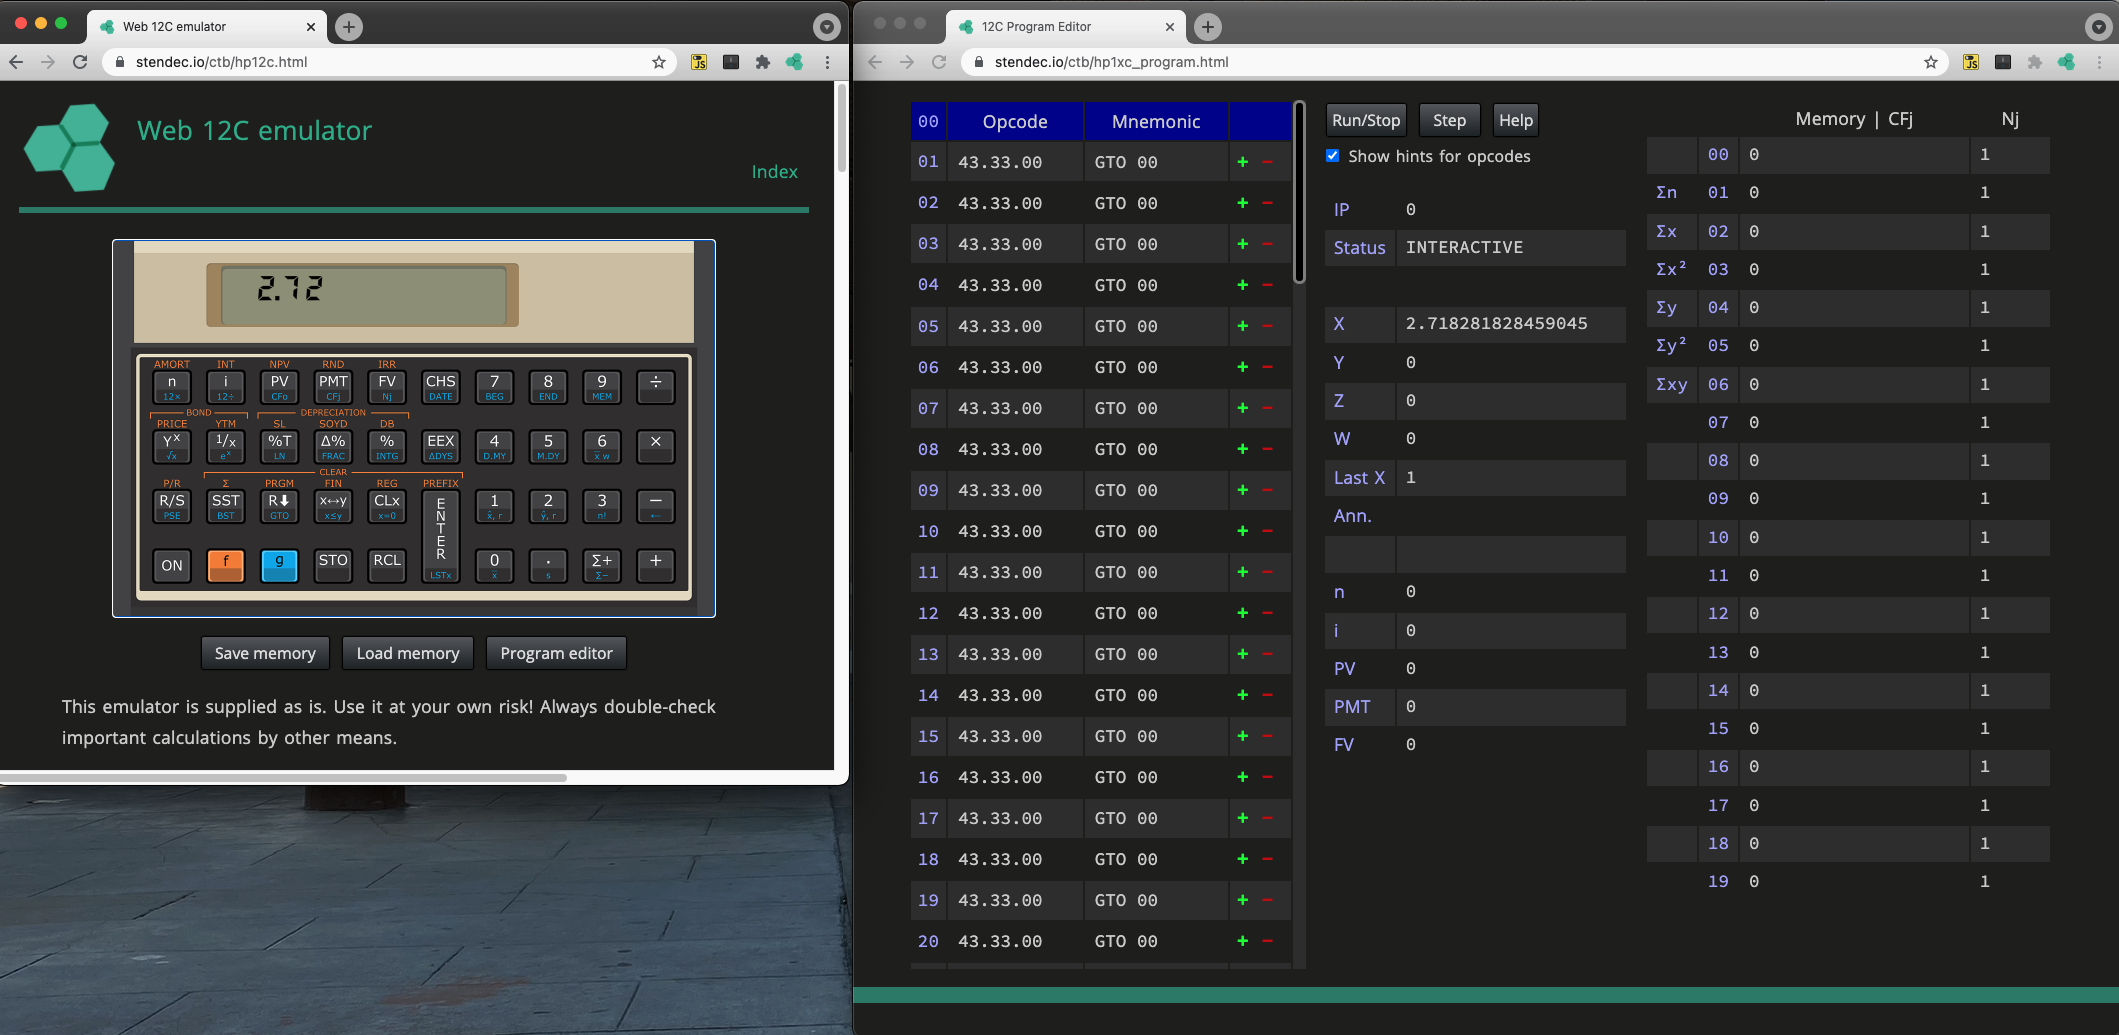
The value of numeric registers is shown with full precision and without formatting. The thousands separator and decimal places only affect the main calculator display, not the tool.
The command buttons are shortcuts for program execution and debugging. The Run/Stop button does the same as the calculator's R/S function. The Step button is similar to SST.
Last but not least, there is the program editor.
At the left column, the editor reflects the current contents of the programming memory, and can be used to edit the program.

While the tool is open, you can still use the traditional P/R mode of the calculator to type a program; the editor will reflect each change in programming memory. But of course using the editor directly is easier and more productive.
The editor has four columns:
The blue row on editor indicates the current instruction pointer (IP). The highlighted instruction has not been run yet; it will be run as the program starts running (Run/Stop button, R/S). Or when you run a single step (Step button, SST).
A program can be entered either in the calculator (function P/R) or in this tool; but not both at the same time. When the calculator is in programming mode, all edition features of the tool are disabled. As well, a program cannot be edited while it is running.
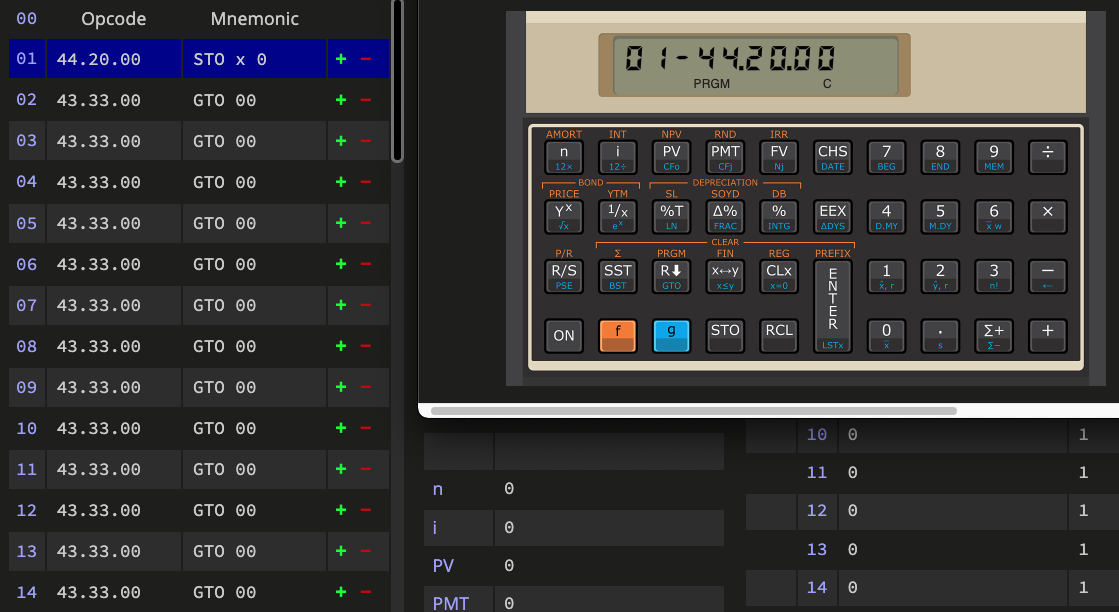
In the figure above, we see the instruction STO x 0 entered in position 01 is shown by the editor in two formats: a numeric code 44.22.00 (opcode), and a human-readable label (mnemonic). You can enter a program in either format. It is your choice.
The RPN calculators show instructions using a numeric format that we call "opcode". The opcode numbers correspond to the keys pressed to reach the instruction.
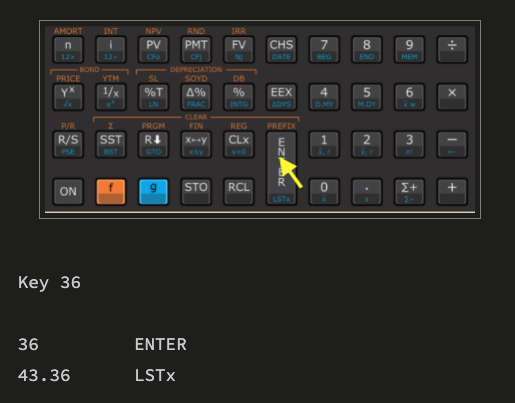
For example, the ENTER instruction has opcode 36. This opcode has a single number, because a single key is pressed to issue this operation.
On the other hand, the instruction LSTx has opcode 43.36, which represents a sequence of two keys: the g modifier (code 43) followed by ENTER key (code 36).
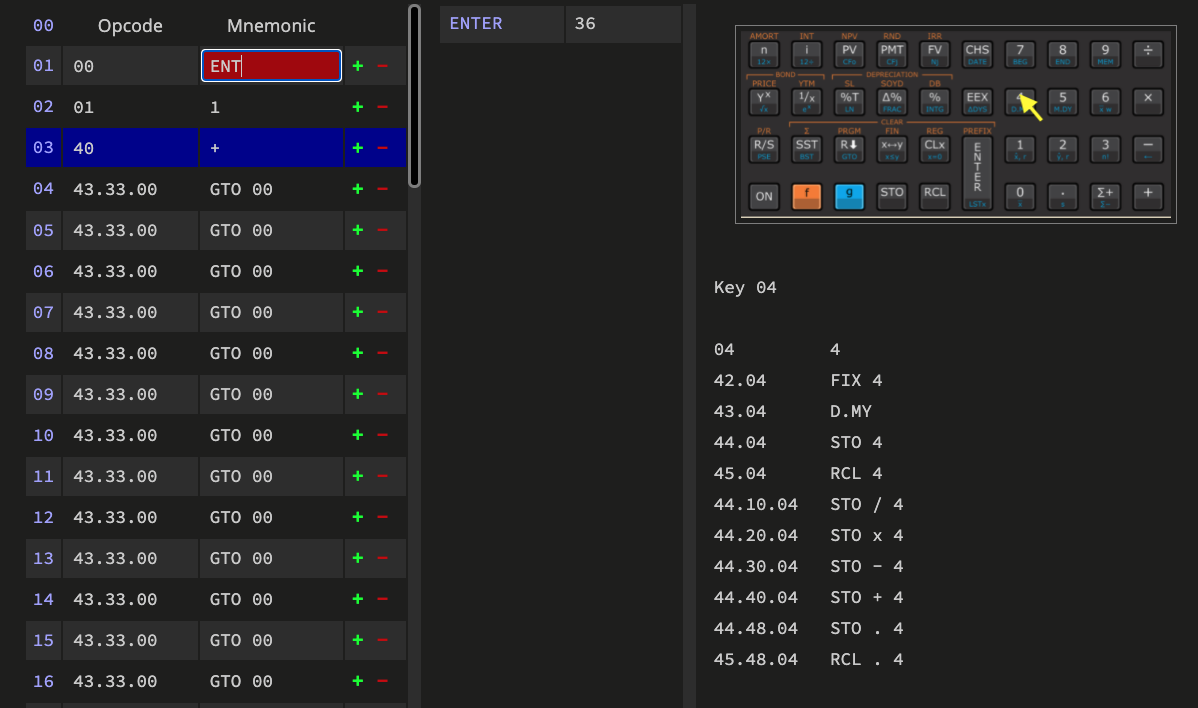
To edit an instruction in opcode format, just click on the field. While the opcode is being edited, two hints are shown in central and right columns.
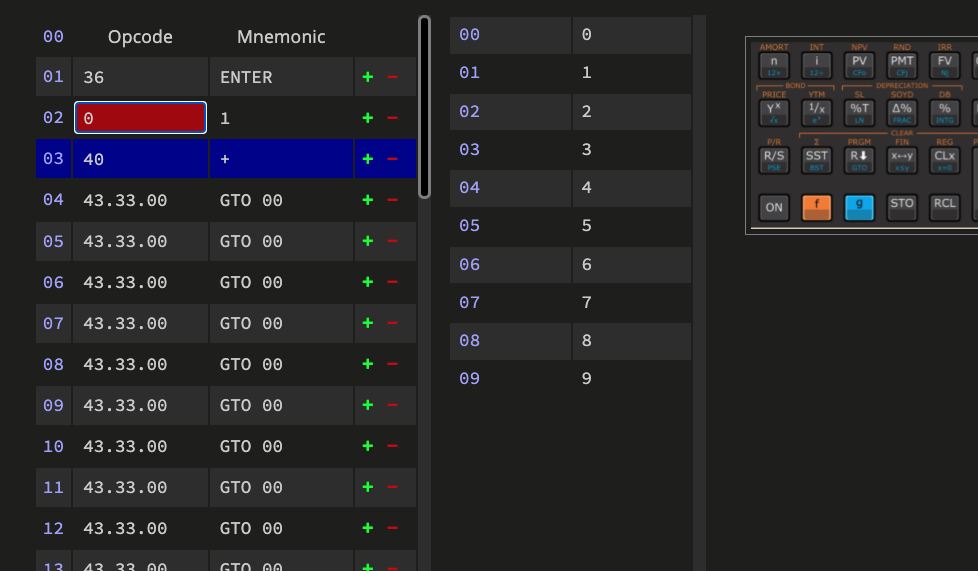
The hint in central column shows a list of valid opcodes. As the opcode is typed, the list is filtered. You can click on an opcode of the list to complete the instruction, saving some typing.
The hint at right column is the calculator key grid. Hover the mouse pointer over any key to get a list of all instructions related to that key.
Leveraging on these hints, you never need to read documentation or know instructions by heart. Just look for what you need, while you are coding.
The usual navigation keys (Enter, Tab, Shift-Tab, arrows) are used to navigate rows and columns within the program editor.
This tool gives human-readable nicknames to every calculator instruction. We call them "mnemonics".
Entering instructions as mnemonics works the same way as entering opcodes. Hints are shown at central and right columns. The mnemonics are generally easier to work with (unless you know all opcodes by heart...). It is easier to figure out what a program does by reading a list of mnemonics than a list of opcodes.

Typing mnemonics is case-insensitive (you can type either LSTX, LSTx or lstx). The editor corrects automatically to the canonical form (in this case, LSTx).
As much as possible, the mnemonics are based on key labels. So, Most of them come naturally: ENTER, LSTx, CHS, digits.
Some key labels have symbols which cannot be easily typed. For example, the instruction R↓ was given the mnemonic "R down" since there is no simple way to type the down-arrow.
Due to similar reasons, the mnemonic of the square root is SQRT, the mnemonic of multiplication is an X, and the division's is the slash /.
In other cases, we chose to replace superscript characters by explicit names. Examples: the mnemonic of ex is EXP; the mnemonic of Yx is POWER.
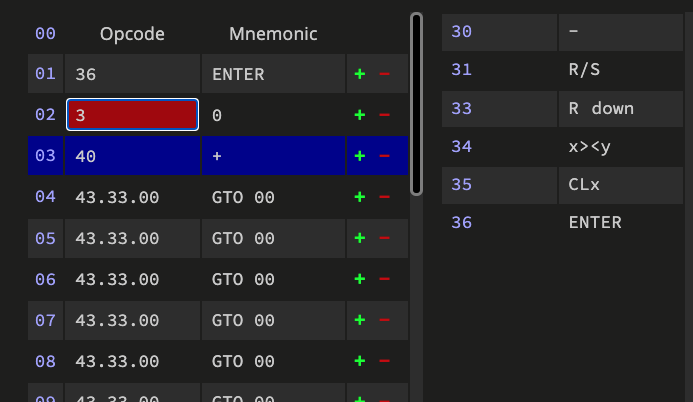
Again, you don't need to know these mnemonics by heart; use the hints and find what you need, as you go. The central column lists all available mnemonics, while the right column allows to find mnemonics tied to each key.
Some instructions of the RPN calculator can only be issued manually, they are not programmable. Examples: CLEAR PREFIX and CLEAR REG. They don't show up on hints, and they don't have assigned mnemonics.
The editor does not allow to enter invalid instructions. If the inserted opcode or mnemonic is invalid, the instruction is converted to 00 (digit 0).
Inserting an instruction (green plus signs in each program row) fills the new instruction with 00 by default.
In RPN calculators, the row 0 of a program (IP=0) has special behavior. This row has no instruction, and cannot be edited. As soon as the instruction pointer is equal to 0, the program stops. In the 12C and 10C flavors, the instruction GTO 00 is indeed used to finish the program.
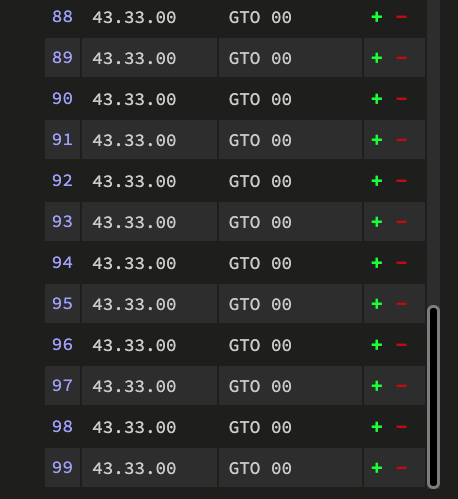
In the 12C e 10C flavors, the program length is always the whole memory. The "empty" portions of the memory are filled with GTO 00.
In 11C, 15C and 16C flavors, the program length is variable. The empty region of the memory shows no instruction. Reaching the end of the program has the same effect as RTN: return from a subroutine, or make IP=0 (therefore stopping the program) if not in a subroutine.
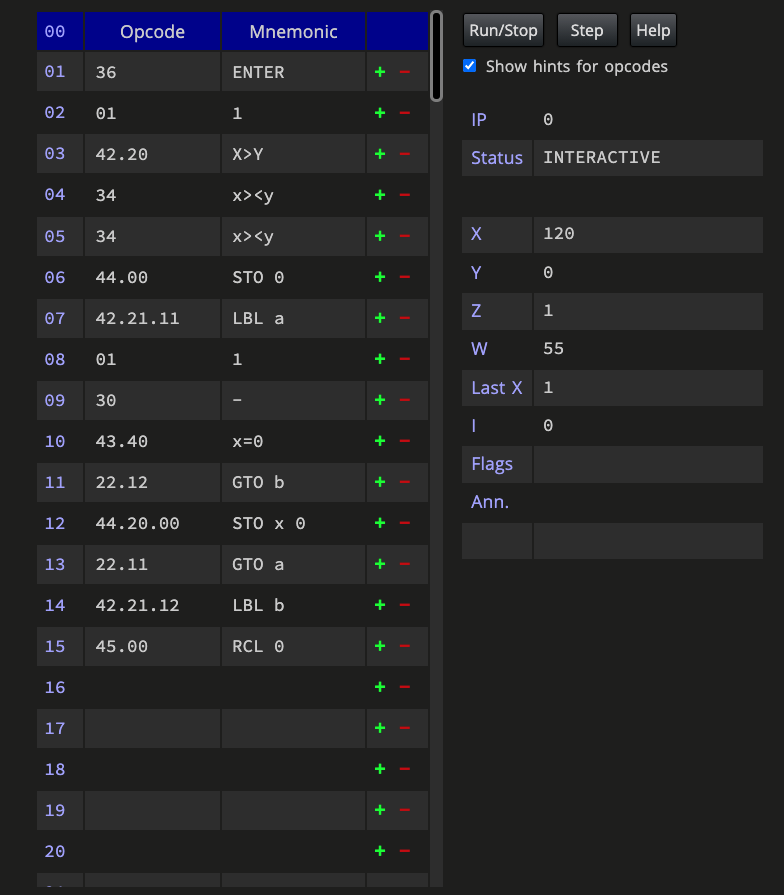
In RPN flavors with variable-length programs, the program must be compact. For example, in the figure above, it would not be possible to enter instructions in row 17 or up. The editor allows to enter a new instruction in row 16 only, since it is adjacent to the preexisting code. When the memory is completely clean, typing must start at row 01.
The calculators's memory, including programs and registers, can be saved, shared and later reloaded. They are stored and passed around as text files.
You can store these files to create your own program library and/or share them with other instances of the calculator. Both the Web version and mobile apps are capable of exporting, importing and sharing these memory files.
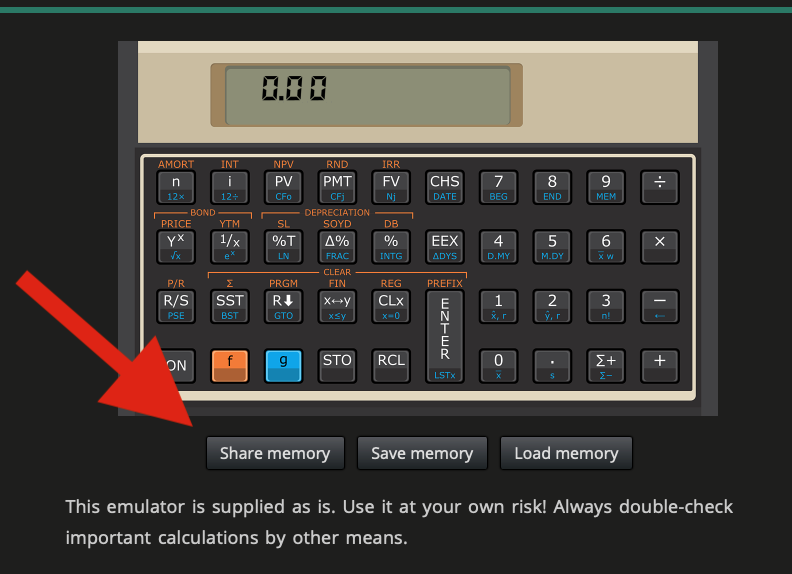
In the Web version, there are three buttons: Save Memory, Load Memory, and Share Memory. (The latter is only available in Safari browser.)
More information on how to share memories in Android app (Touch RPN) can be found here.
More information on how to share memories in iOS app can be found here.
(*) The tool communicates with the calculator using a BroadcastChannel. Some browsers limit the bandwidth of this channel between two tabs of the same window. This limitation can make the tool feel sluggish, or even make it show outdated contents.
This issue does not affect communication between two separate windows. Because of that, we recommend the calculator and the program editor tool are run on separate, side-by-side windows.